

Airtel DLT registration is a free 4-step process – entity registration, OTP/email verification, document upload, and approval
Wondering how to ace your Airtel DLT registration the first time?
Like other business procedures, you’ll submit various documents and details, then you’ll wait.
Imagine waiting for 48 hours only to be denied. The worst part is that you’ll be unable to reach your customers via SMS until you get approved.
No one wants all that.
Thankfully, in this guide, you’ll learn everything you need for a successful Airtel DLT registration.
We’ll show you the entire process so that your request gets approved on your first try.
And you’ll be sending SMS to your customers without any hindrances.
You can watch this tutorial video that goes through the process from beginning to end. You can also read the blog if you prefer to read”
What is DLT?
DLT (Distributed Ledger Technology) is a decentralized database TRAI uses to verify business SMS senders and block spam and fraud.
There are different uses of DLT. In this case, TRAI uses DLT to access every enterprise’s information. This makes it easier to enforce accountability and safety measures.
Fraudsters have used SMSes to deceive countless victims. Therefore, the Telecom Regulatory Authority of India (TRAI) developed DLT to counter this. Before any message goes out, the database checks it to ensure compliance and security.
What is Airtel DLT registration?
Airtel DLT registration is submitting your business details to Airtel’s DLT platform so it can verify and approve you to send SMS.
There are other telecom operators with their own DLT registration platforms, including Videocon, Tata Teleservices, Vodafone, Jio, BSNL, and MTNL. This article focuses specifically on the Airtel DLT registration process.
What documents do you need for Airtel DLT registration?
Airtel DLT registration needs 5 free documents: PAN card, business proof, ID proof, OTP contact details, and a signed authorisation letter.
Before you begin the DLT registration process, have the following information ready:
- Company PAN card
- GST/TAN/FSSAI/memorandum of association/incorporation/shop registration certificate
- A government-issued identification document: PAN/DL/Voter ID/Aadhar of the authorised person
- Email address and Phone number. (you will receive an OTP when you complete the registration request)
- A declaration of the authorised person on the company letterhead. Signed and sealed by the principal partners/directors.
There are no charges for the Airtel DLT registration, it’s free. Make sure that the documents are in soft copy format on your device and less than 10Mb in size. Once you have all these documents with you, you are all set to apply. Now follow the step-by-step process below.
| Having issues completing your Airtel registration? Our team can help you. Contact us or send an email to info@smscountry.com. |
How do I complete Airtel DLT registration step by step?
Airtel DLT registration has 15 steps: sign up, verify OTP and email, submit business details, upload 5 documents, then await approval.
- On your phone or laptop browser go to https://dltconnect.airtel.in/
- Click on “Sign Up”.
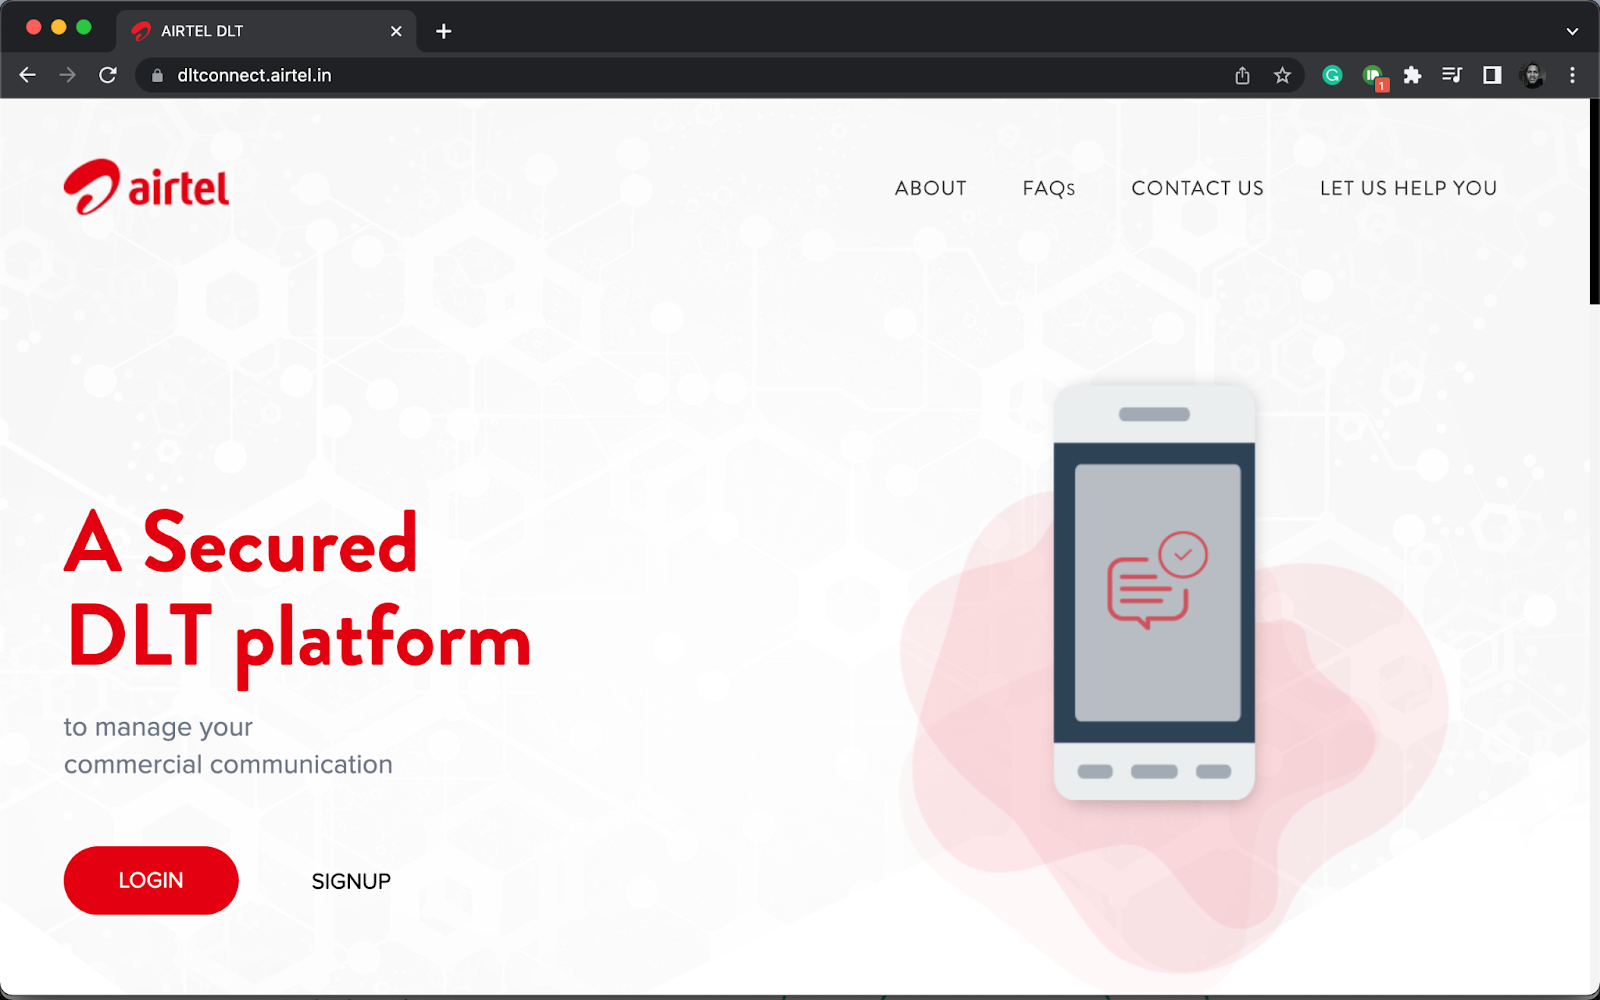
- Click on “As Enterprise” then click “Next”.
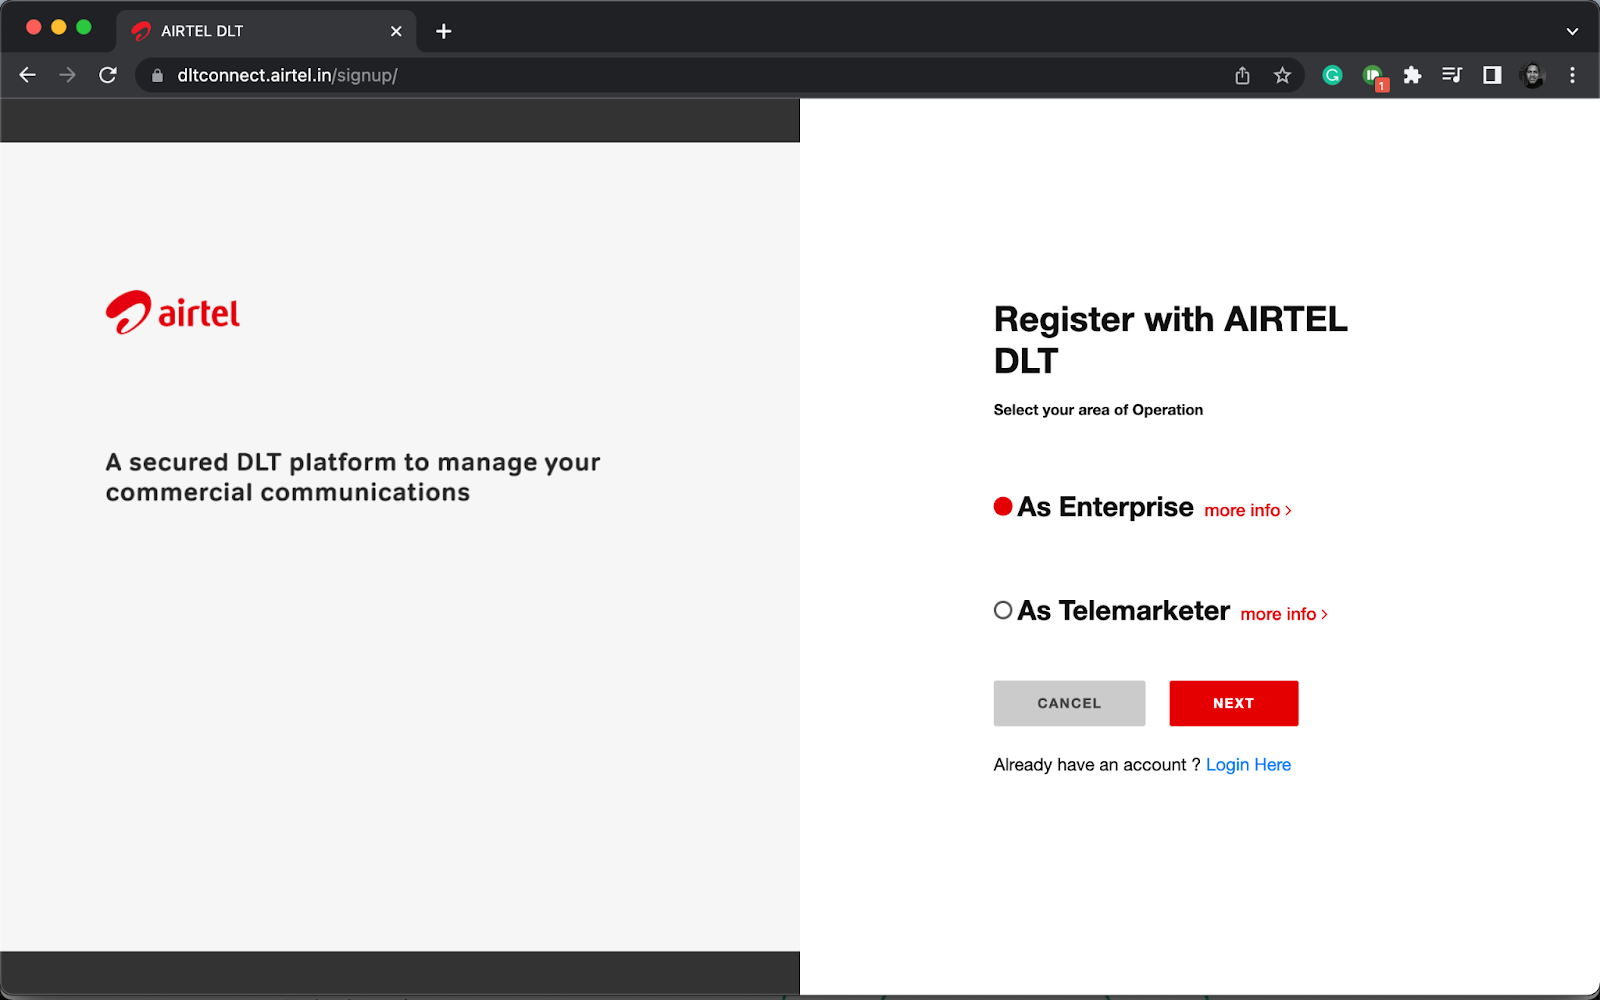
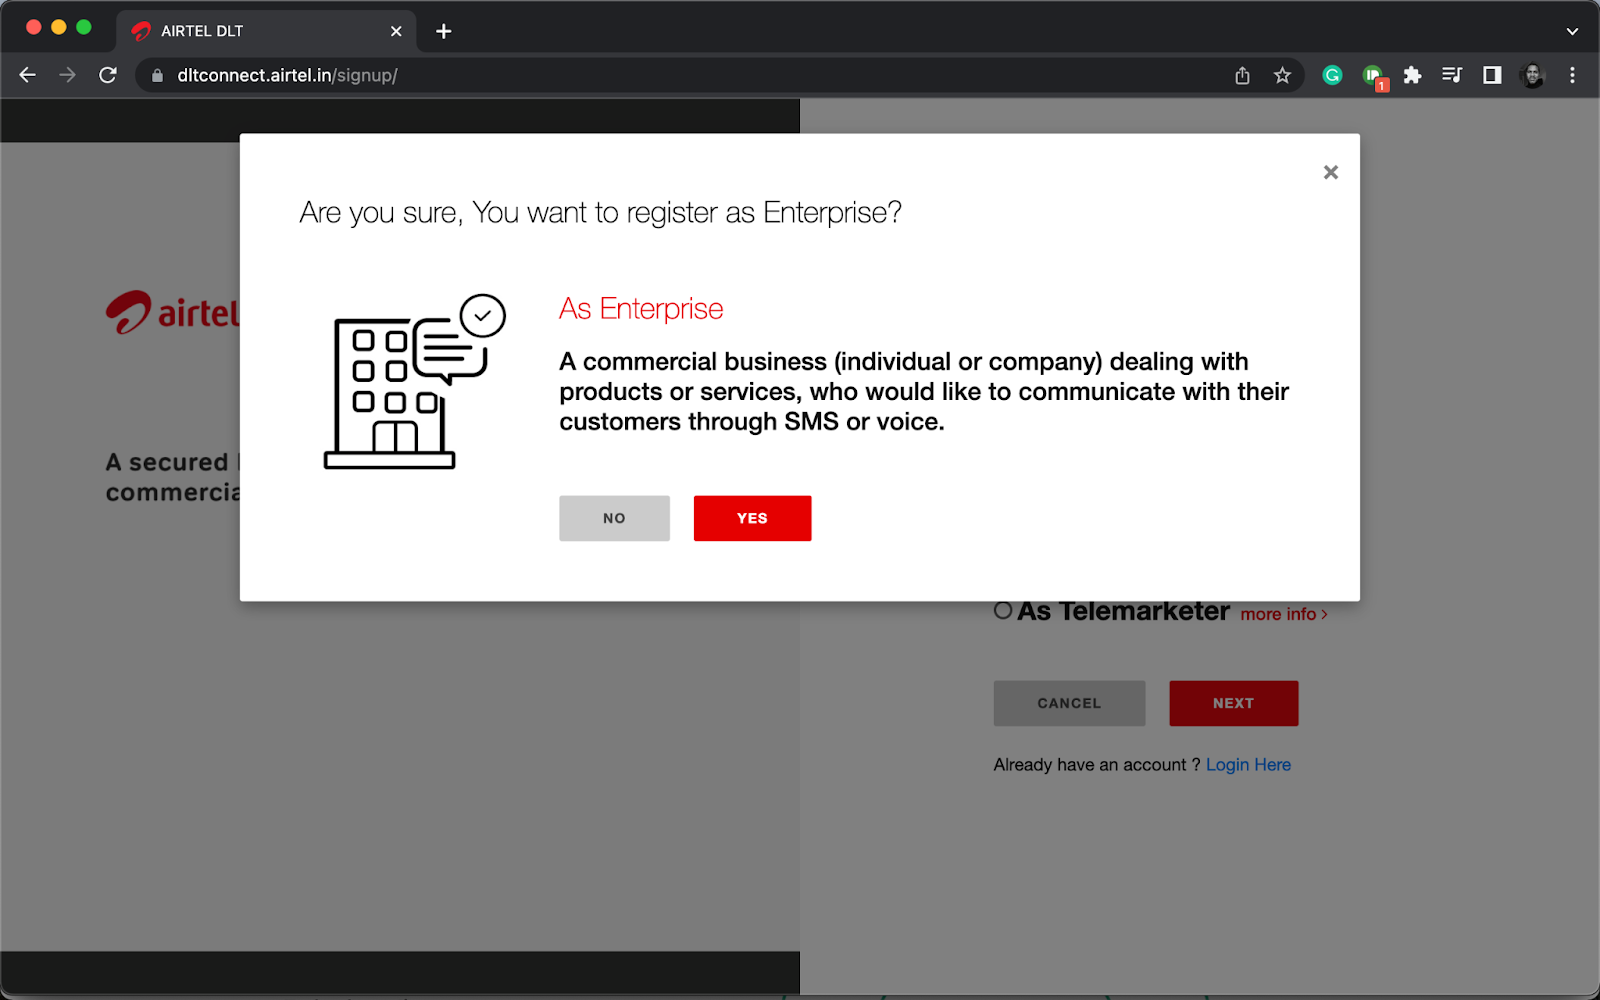
- A pop-up will appear like the one below. Select “Yes”.
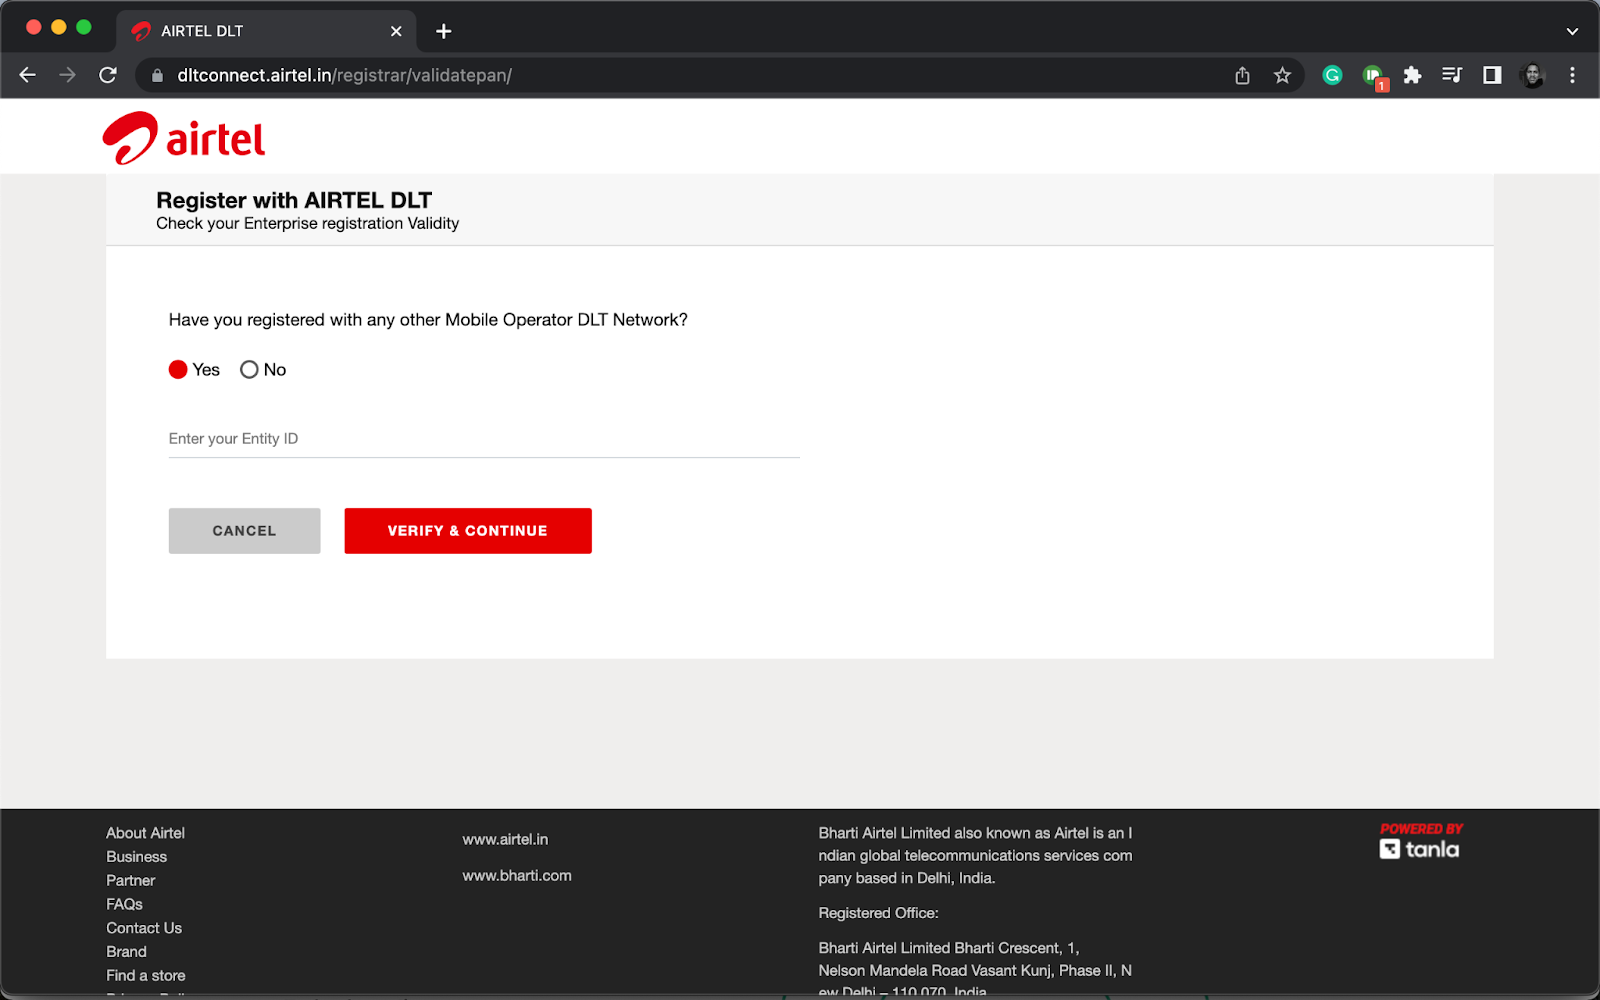
- On the next page, you will get a question – “Have you registered with any other mobile operator DLT network?”
- Click “Yes” if you have and then enter your enterprise ID (the one that you received from the other DLT portal).
- If you haven’t, then click “No” and enter your Business PAN number.
- Click “Verify & Continue”.
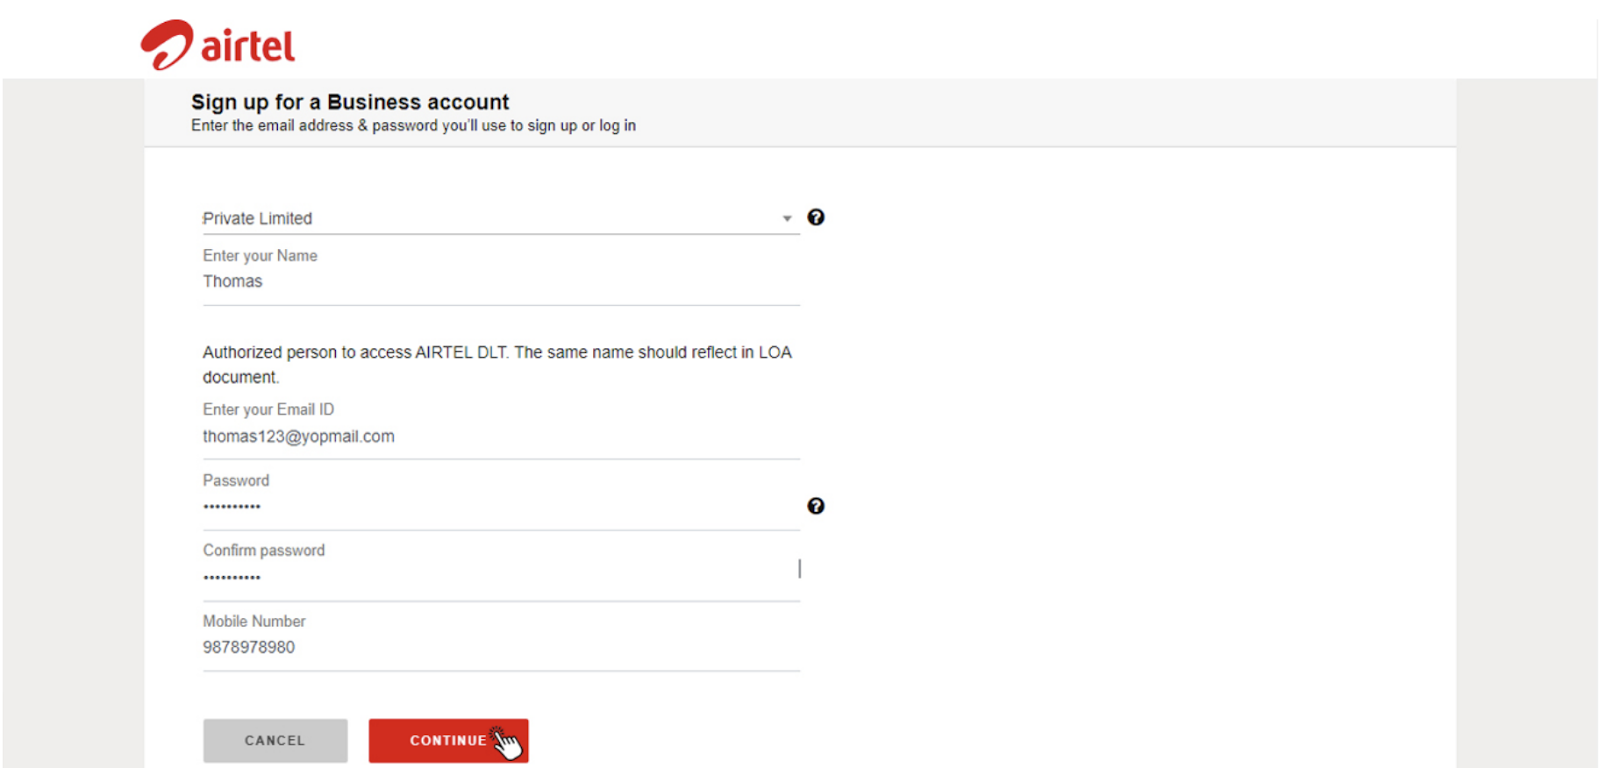
- Now select your business type from the drop-down menu and enter your name.
- Create your login details and click “Continue”.
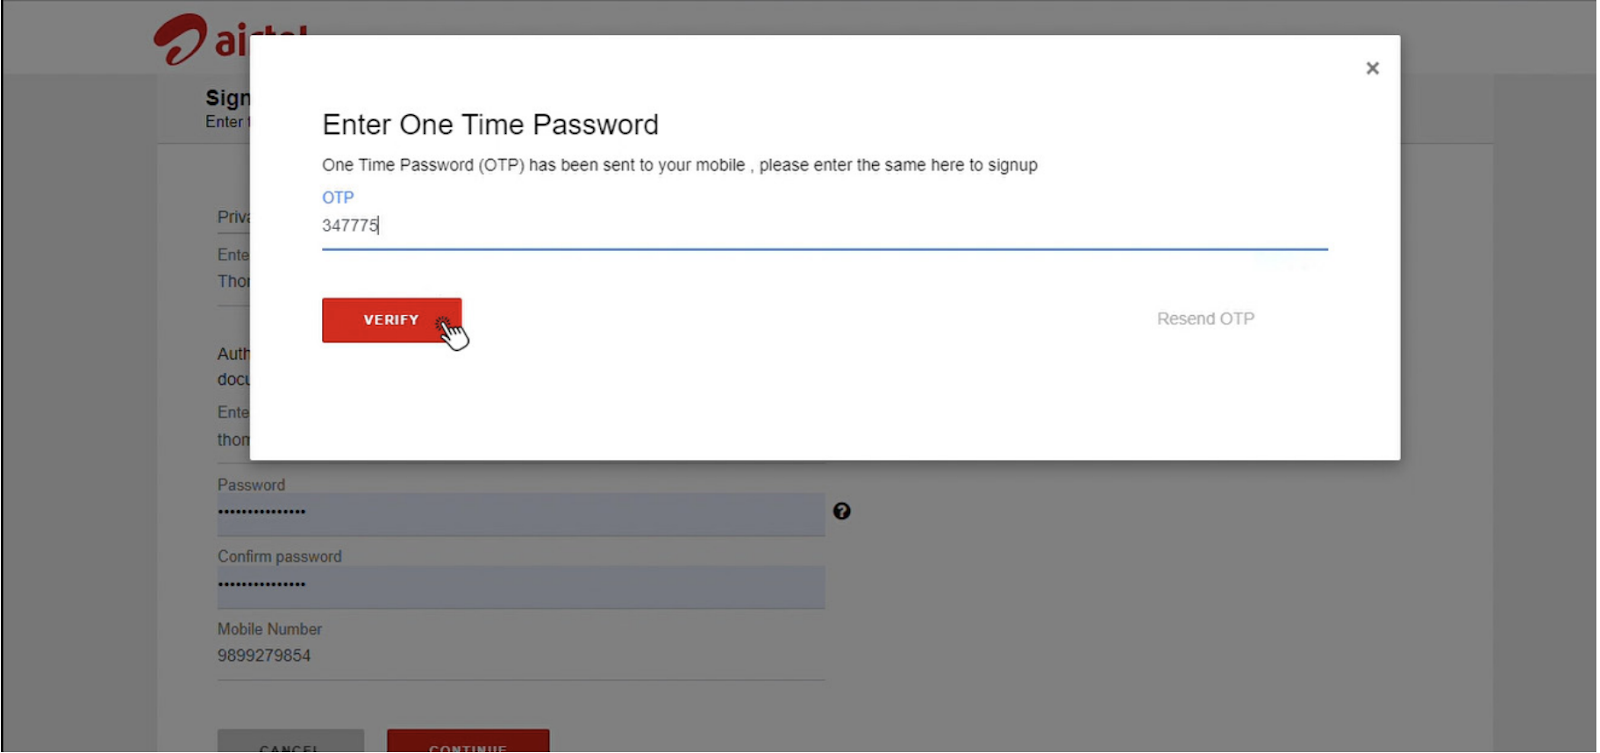
- You will receive an OTP on the mobile number you filled in.
- Enter the number on the page and click “Verify”.
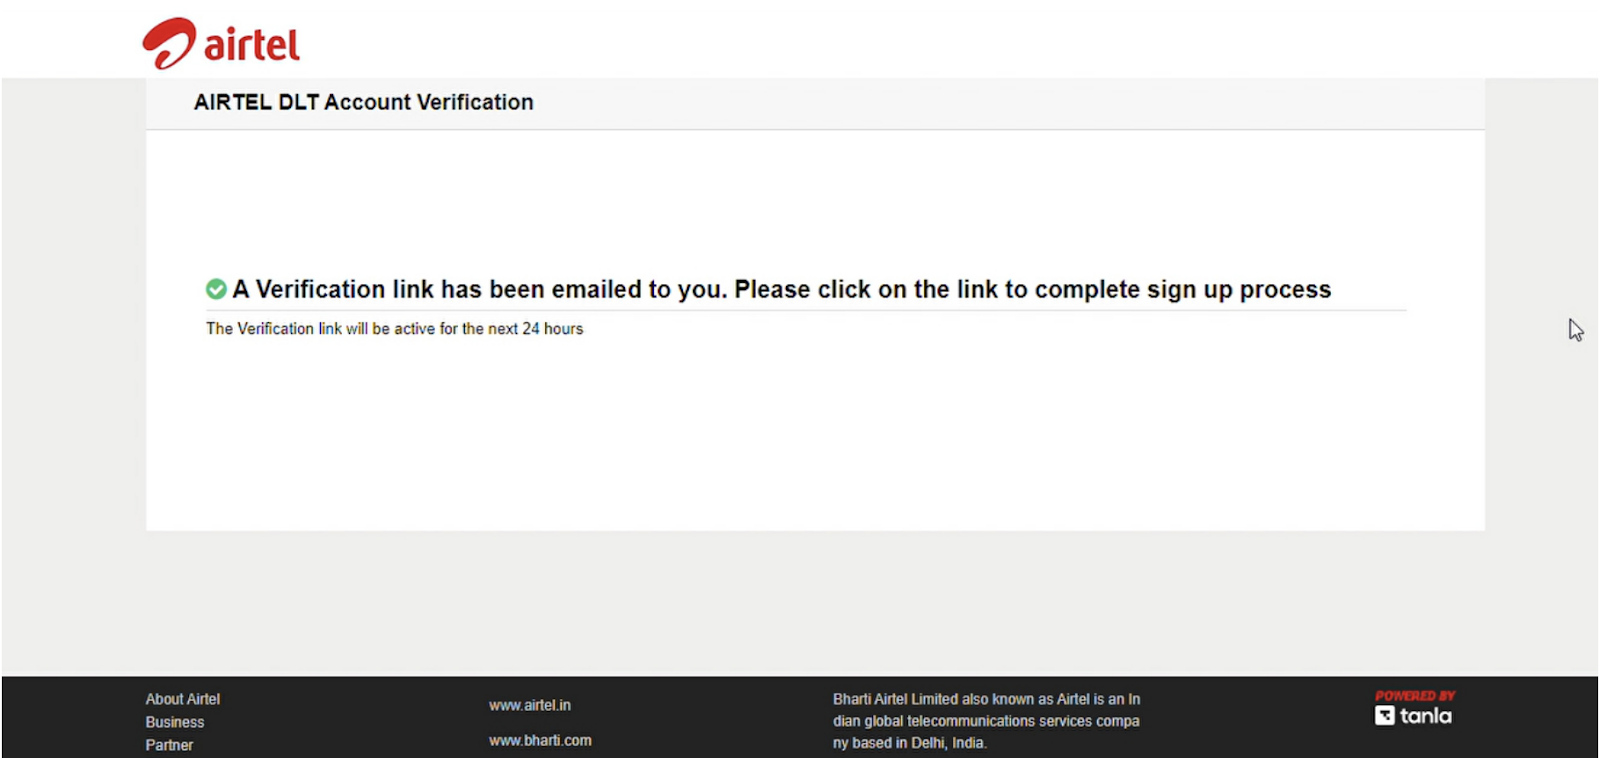
- You will also receive a verification link via email to complete the registration process.
- Go to your email and the link to activate your account.
- Click “Next” on the page that appears to log in.
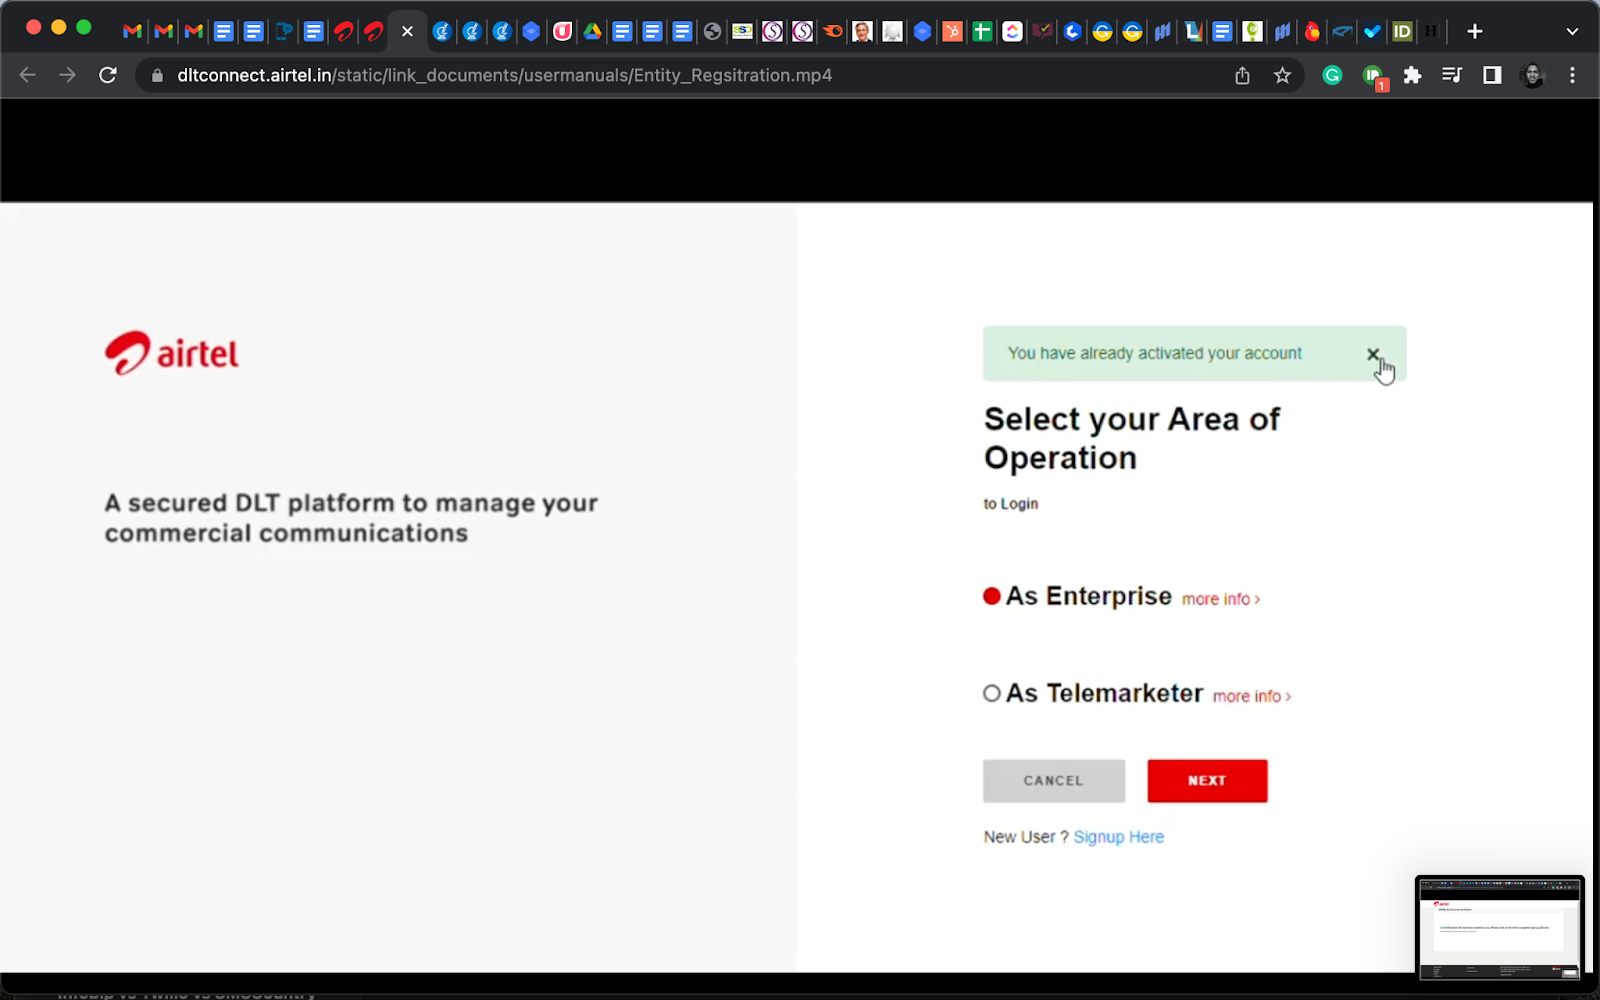
- Enter the email and password you used to register and click “Login”.
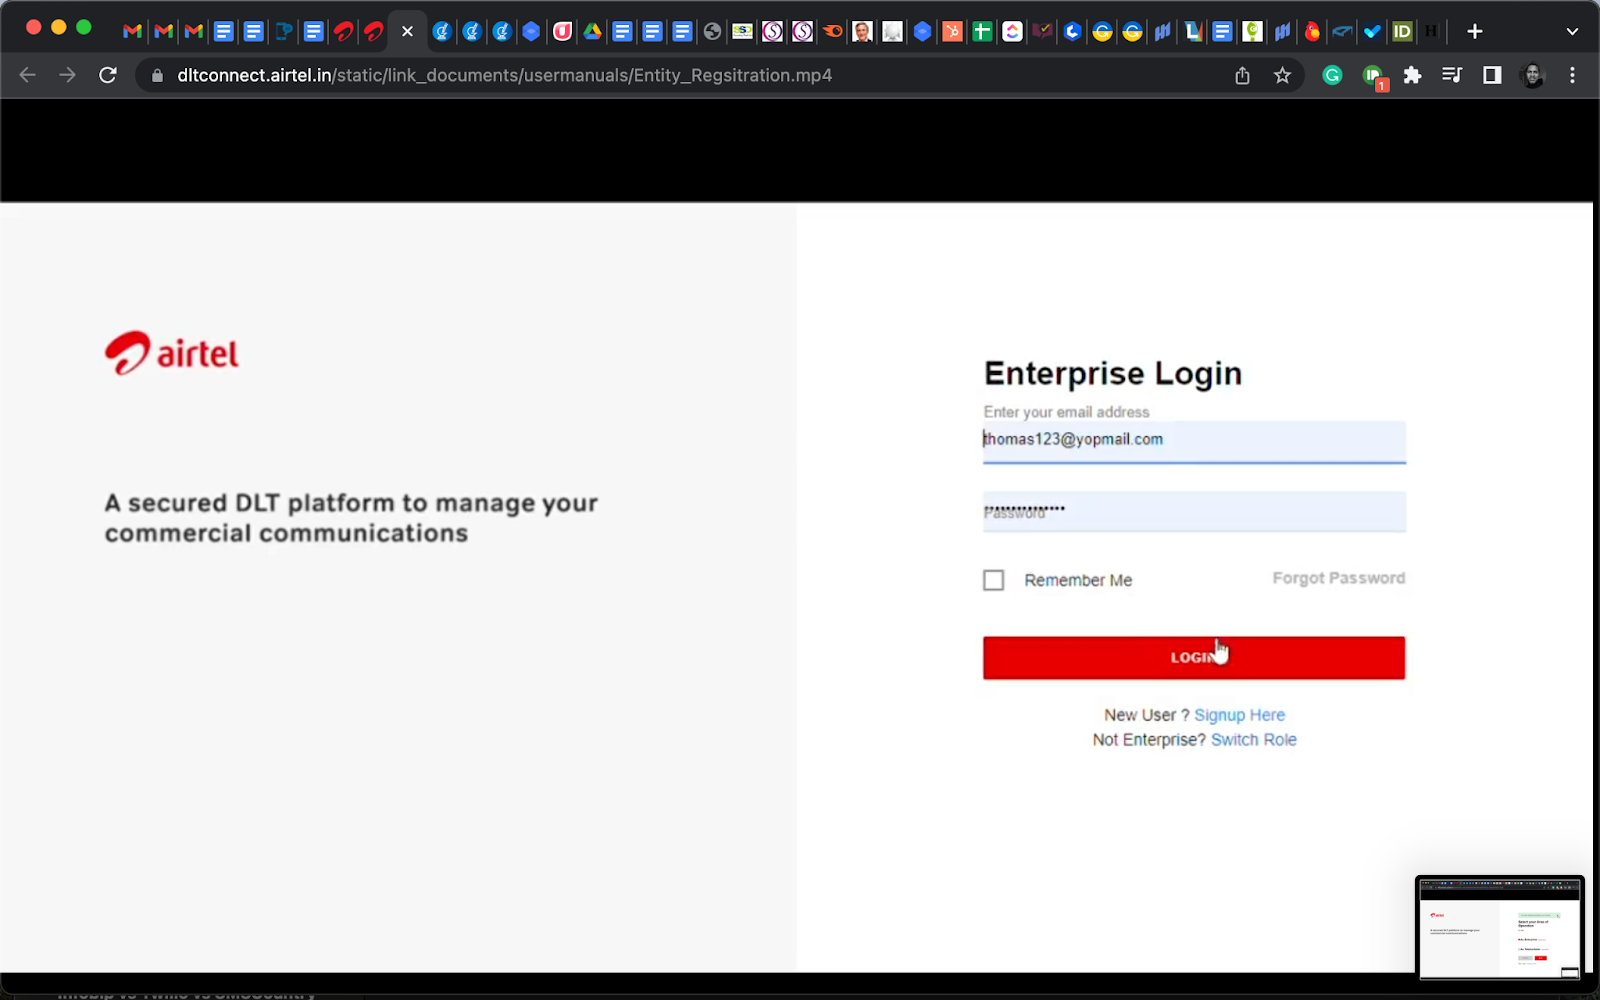
- You will receive an OTP on the registered mobile number. Enter the OTP and click “Verify”.

- Now fill in the details of your business in the spaces provided.
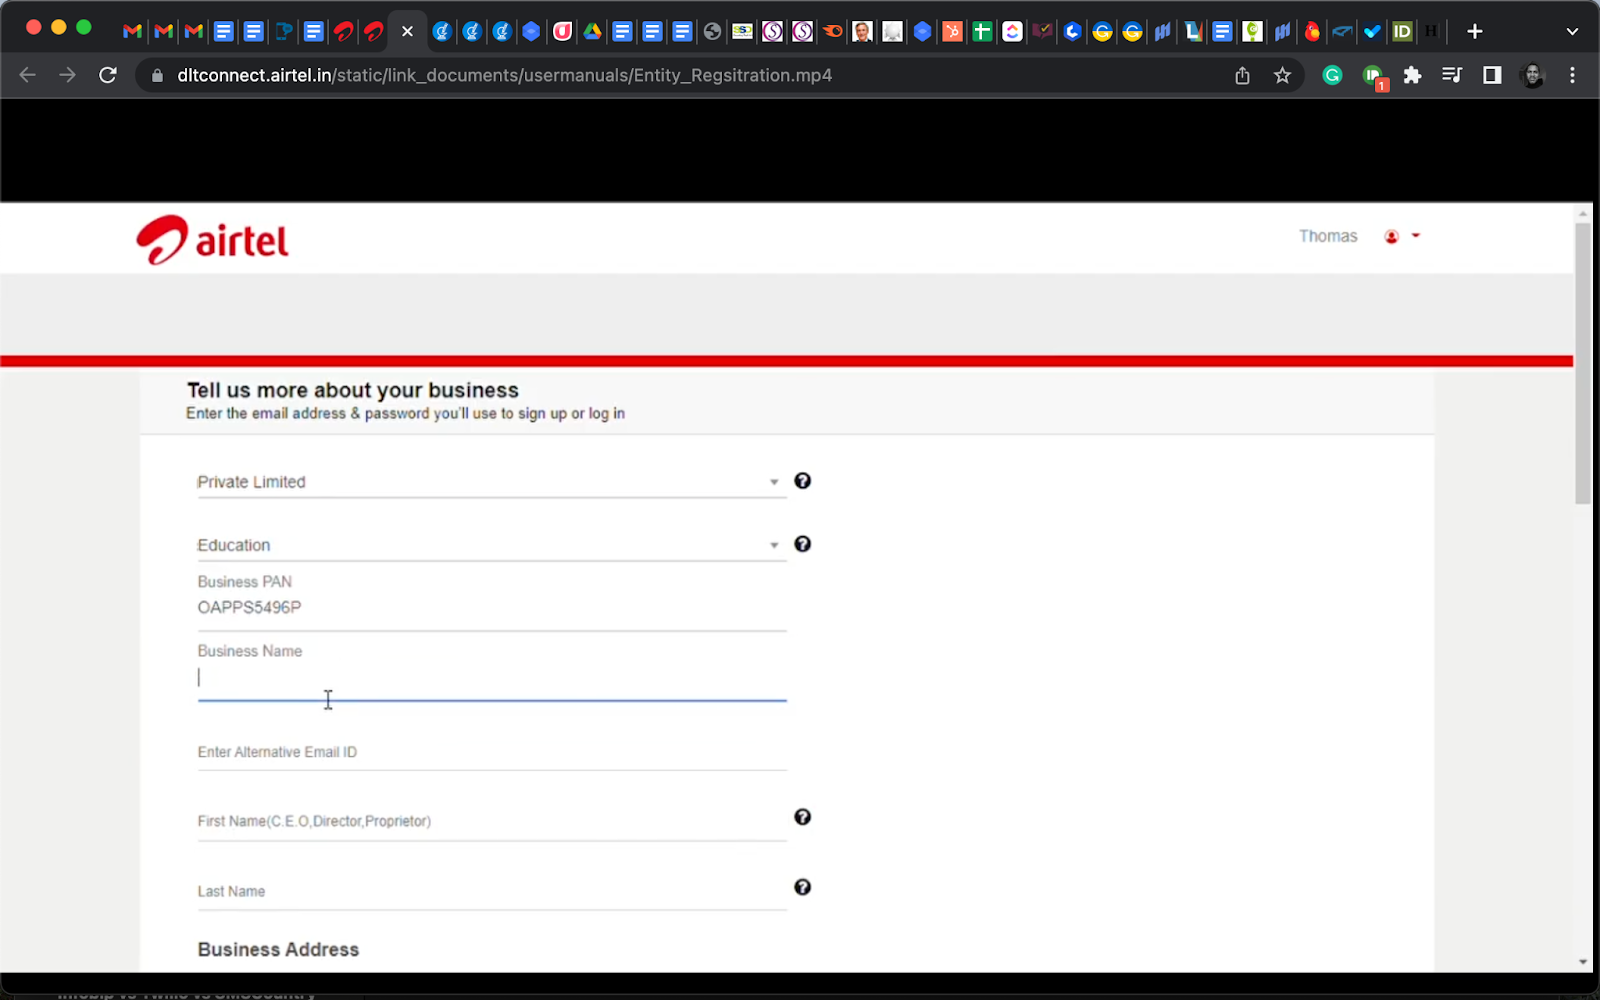
- Please use the same business address as the one on your PAN card.
- After filling the spaces in this section click “Continue”.
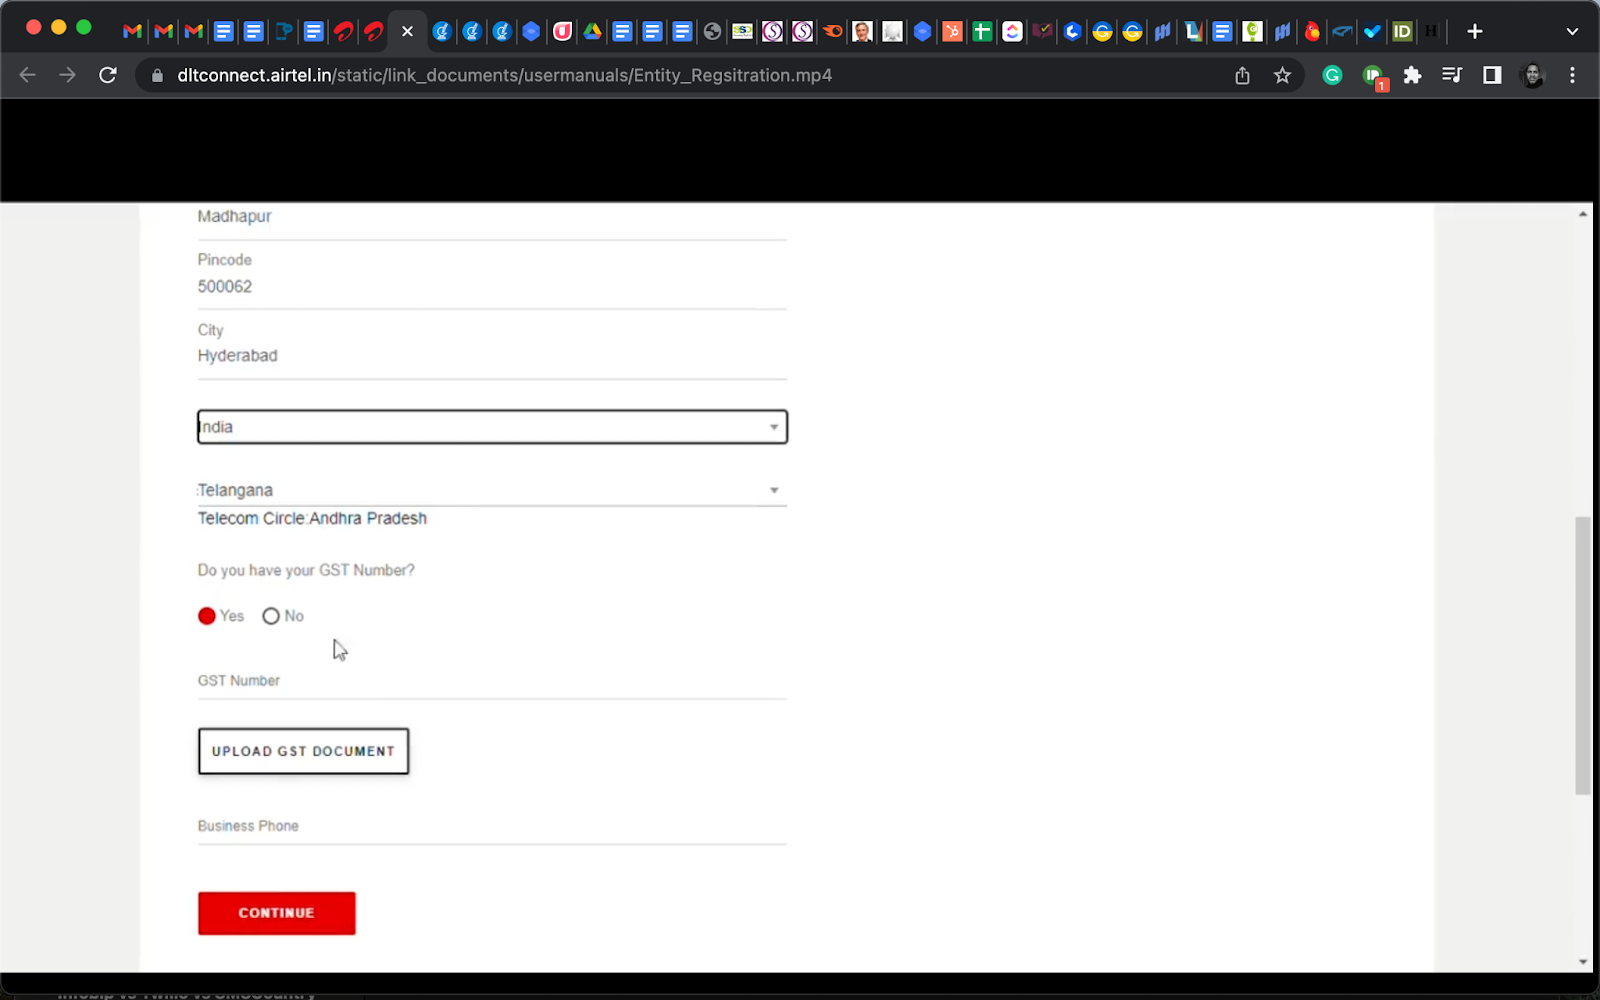
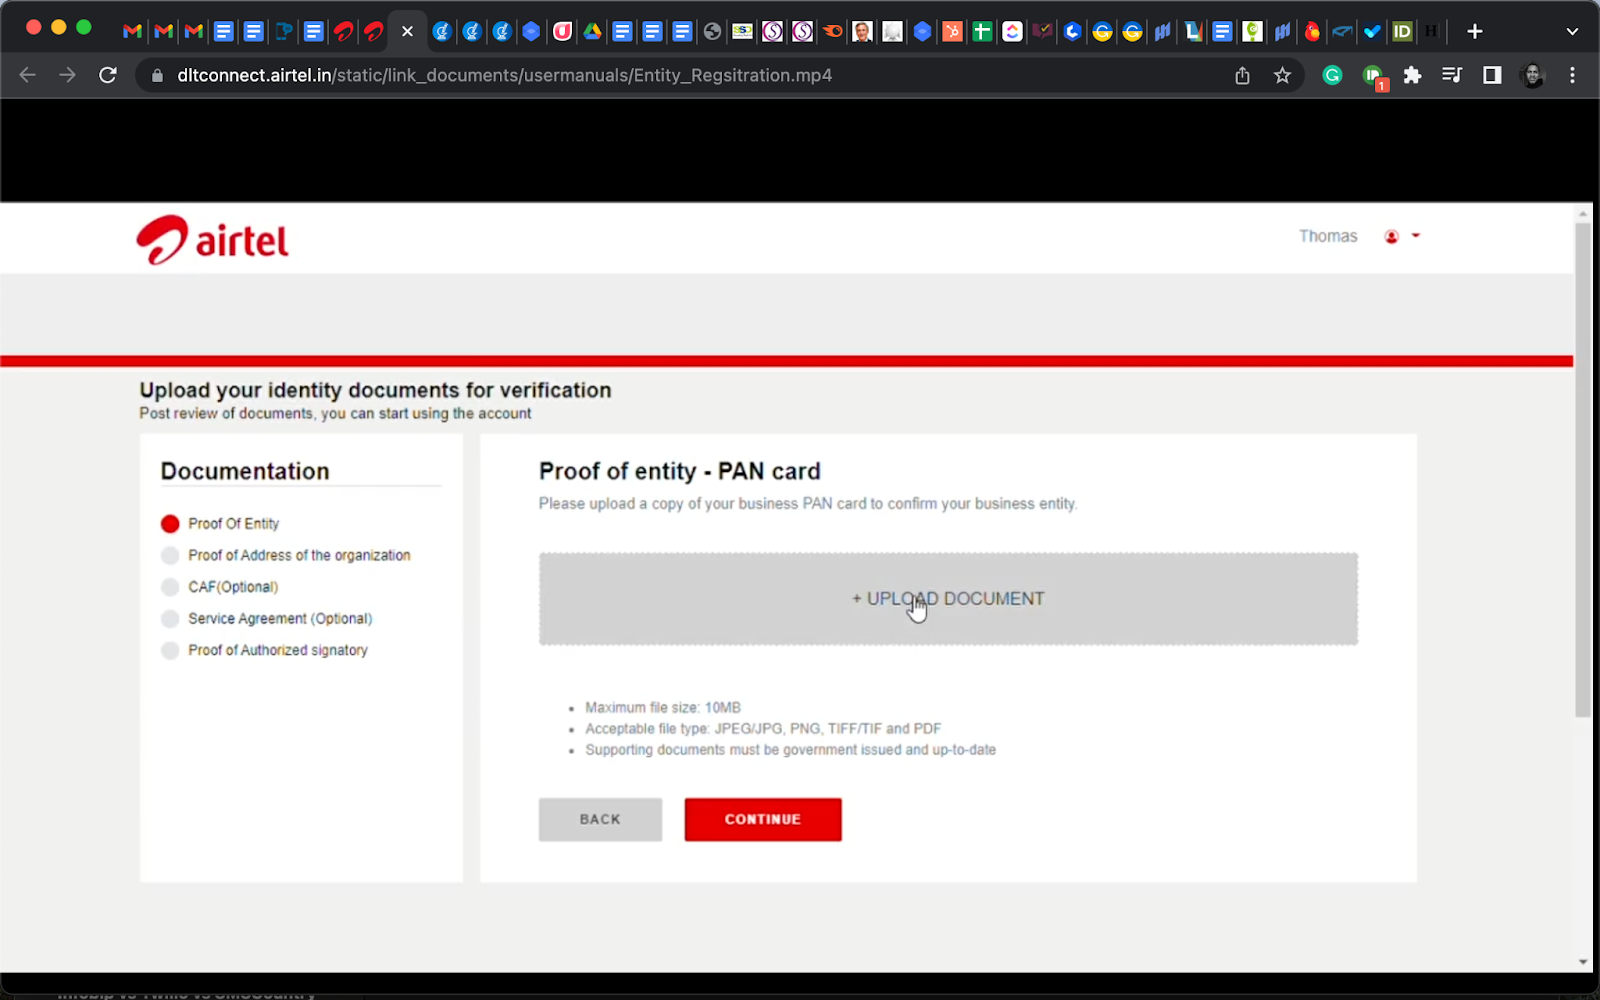
The next page will have five sections for document uploads:
- Proof of entity
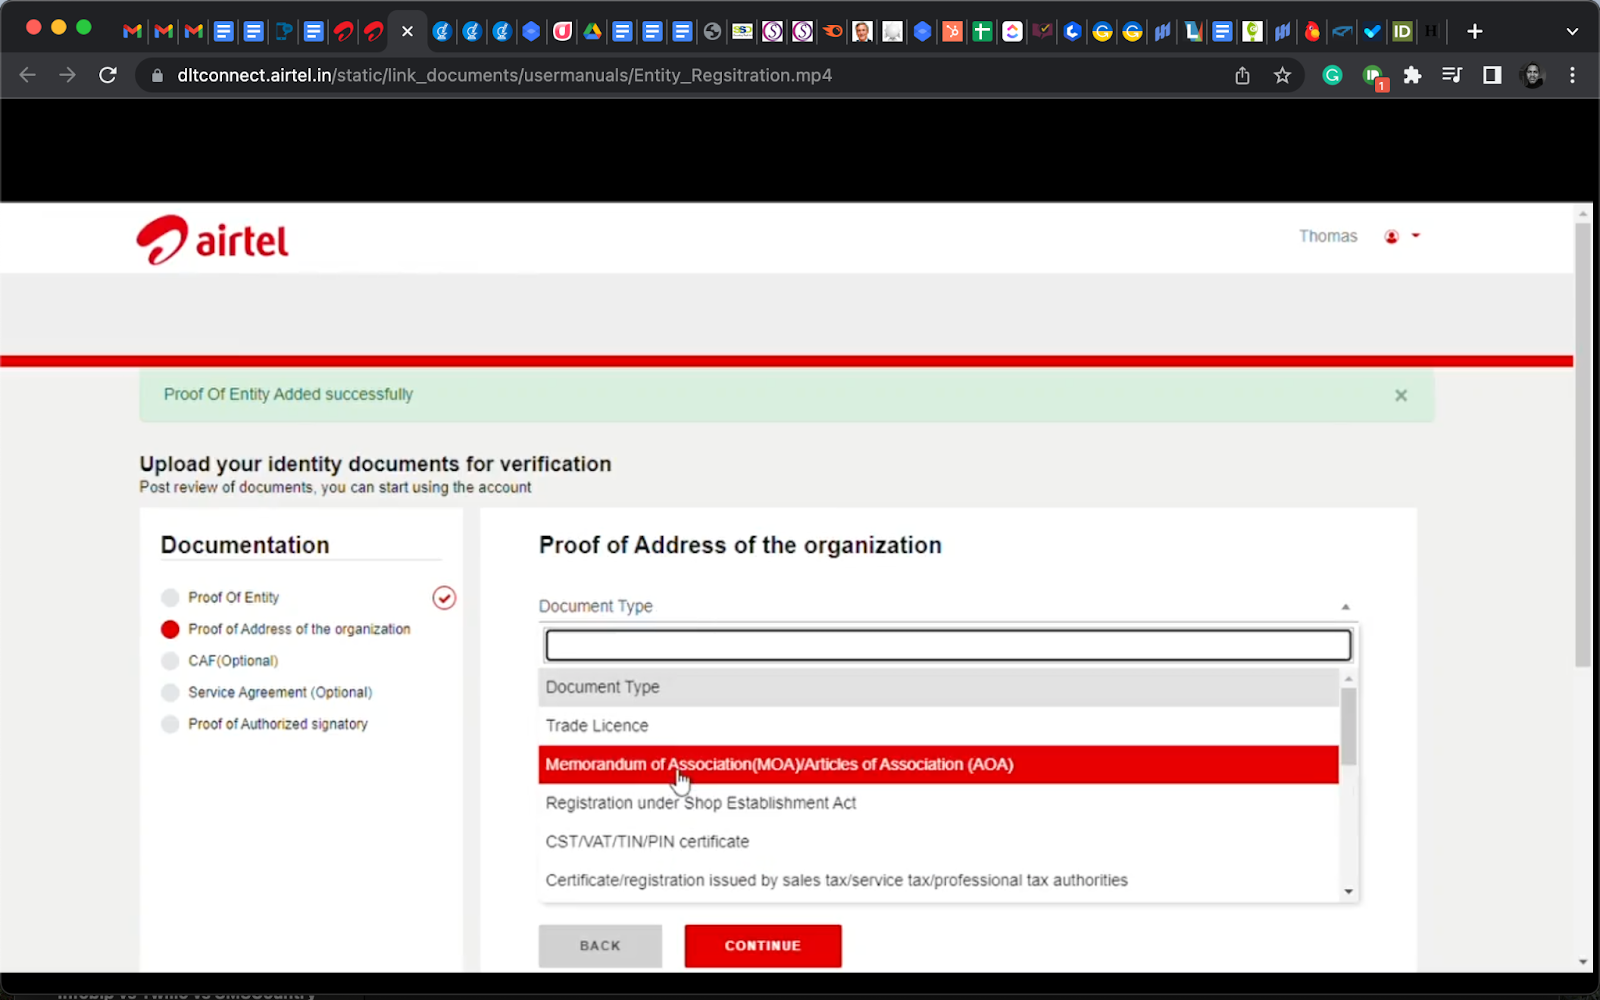
- Proof of address of the organisation
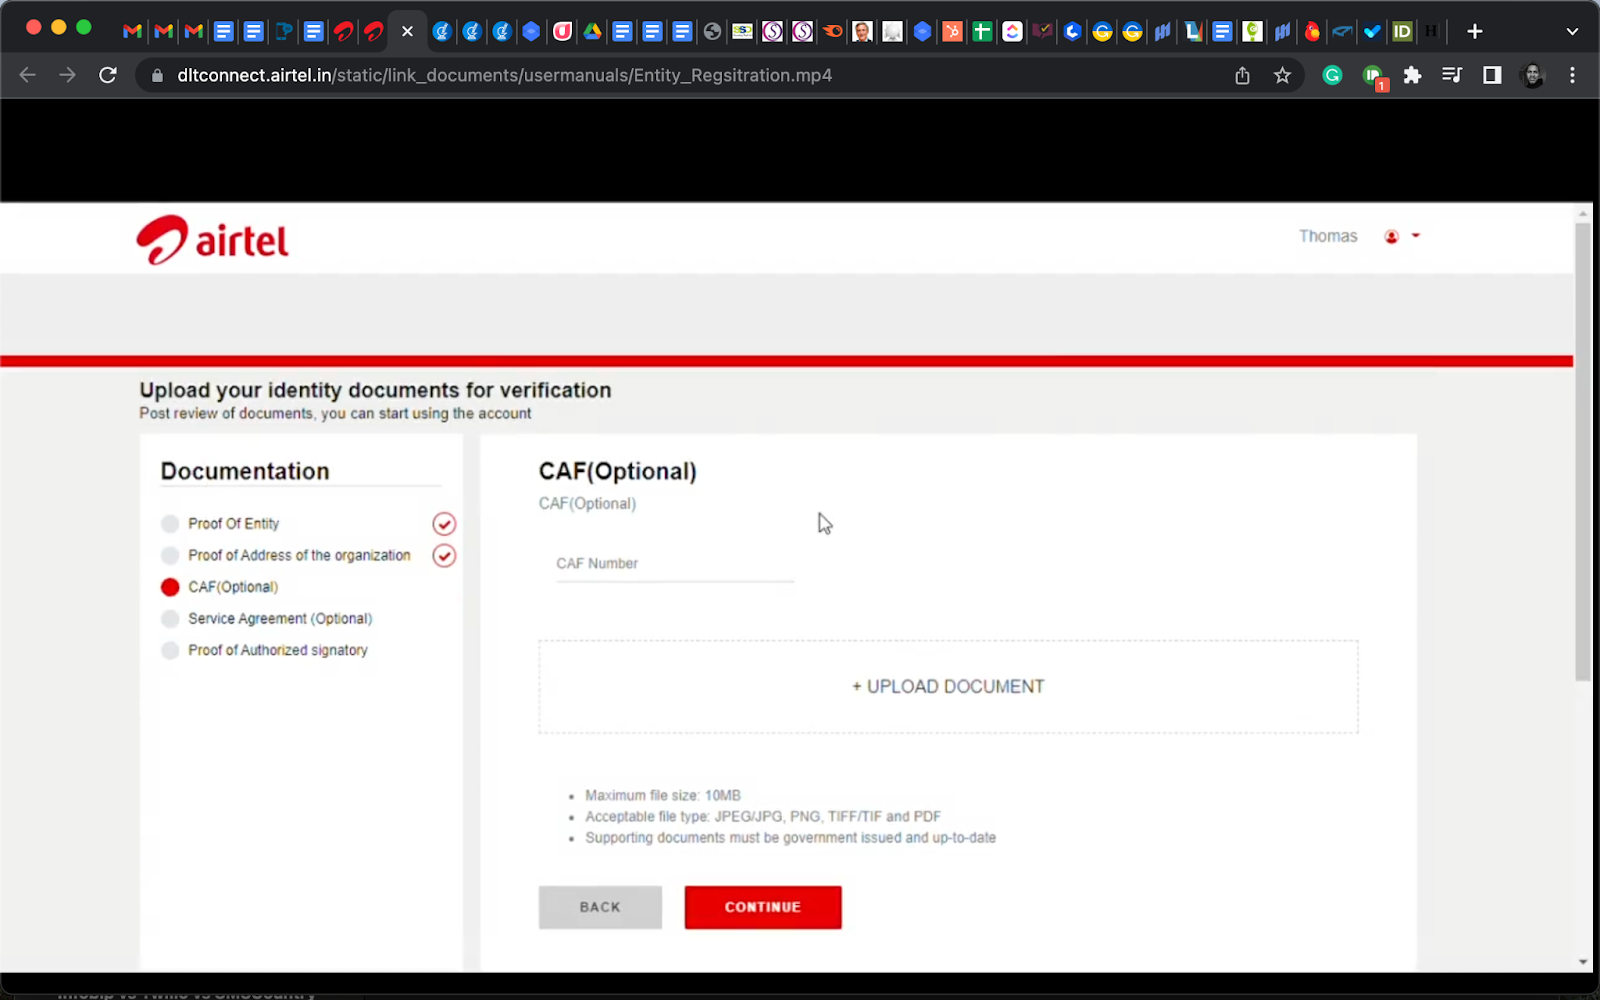
- CAF (optional) – fill in your CAF number, upload the document, and click “Continue”.
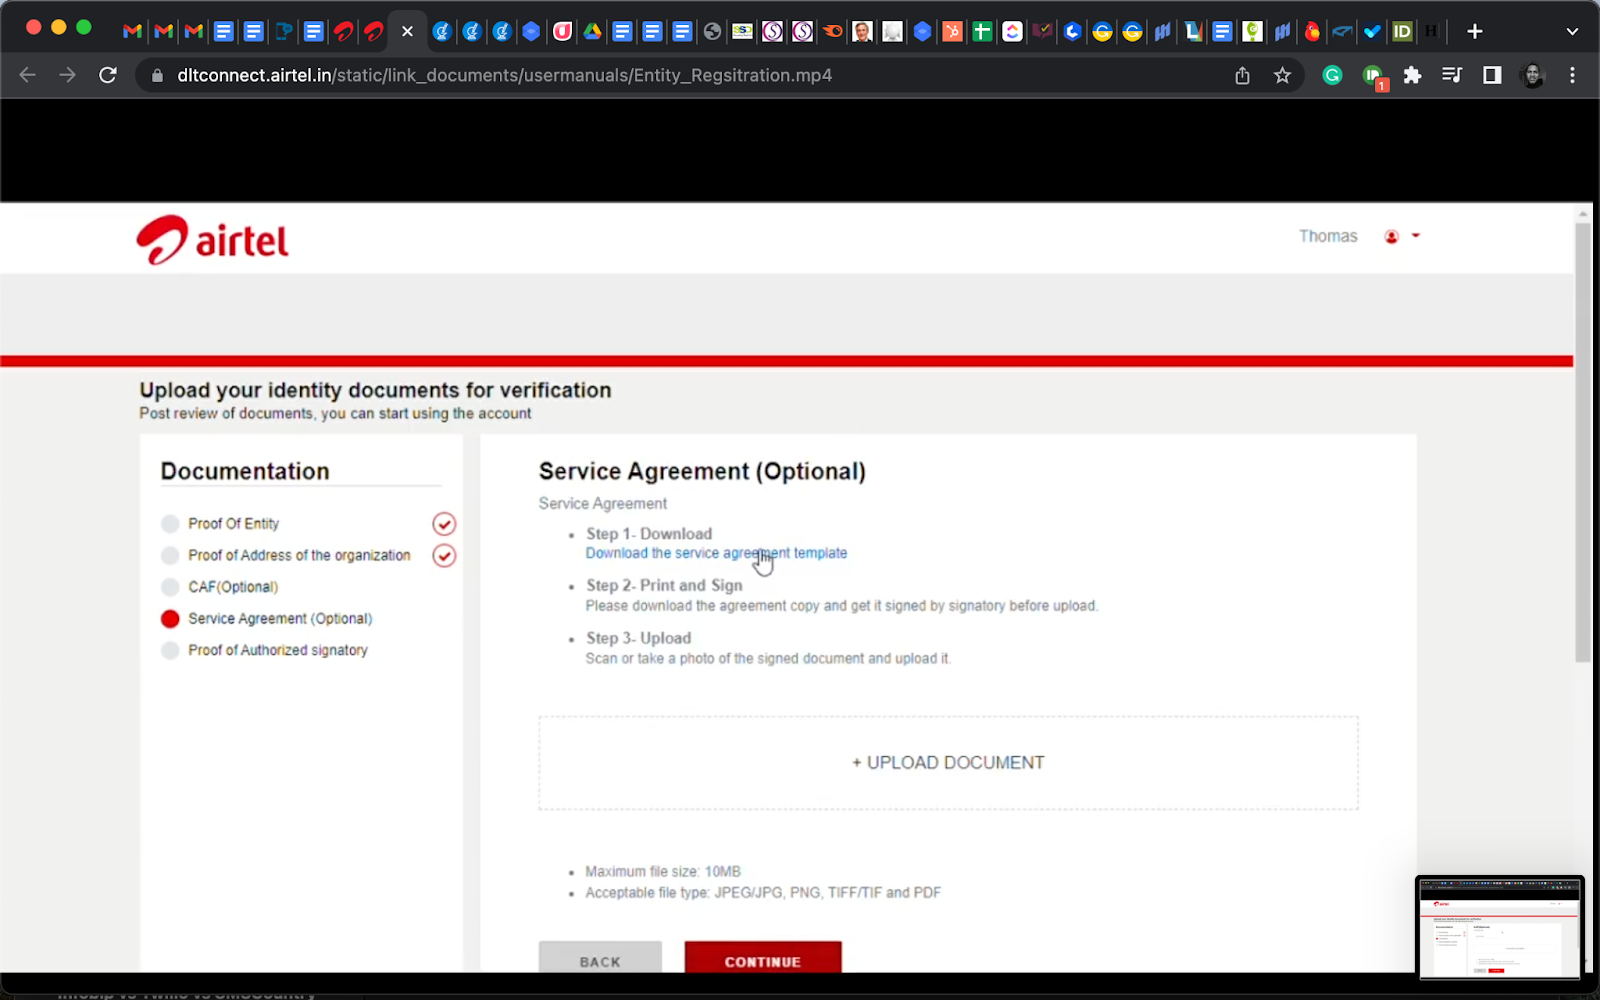
- Service Agreement (optional) – Follow the instructions on the page.
- Proof of authorised signatory (both required).
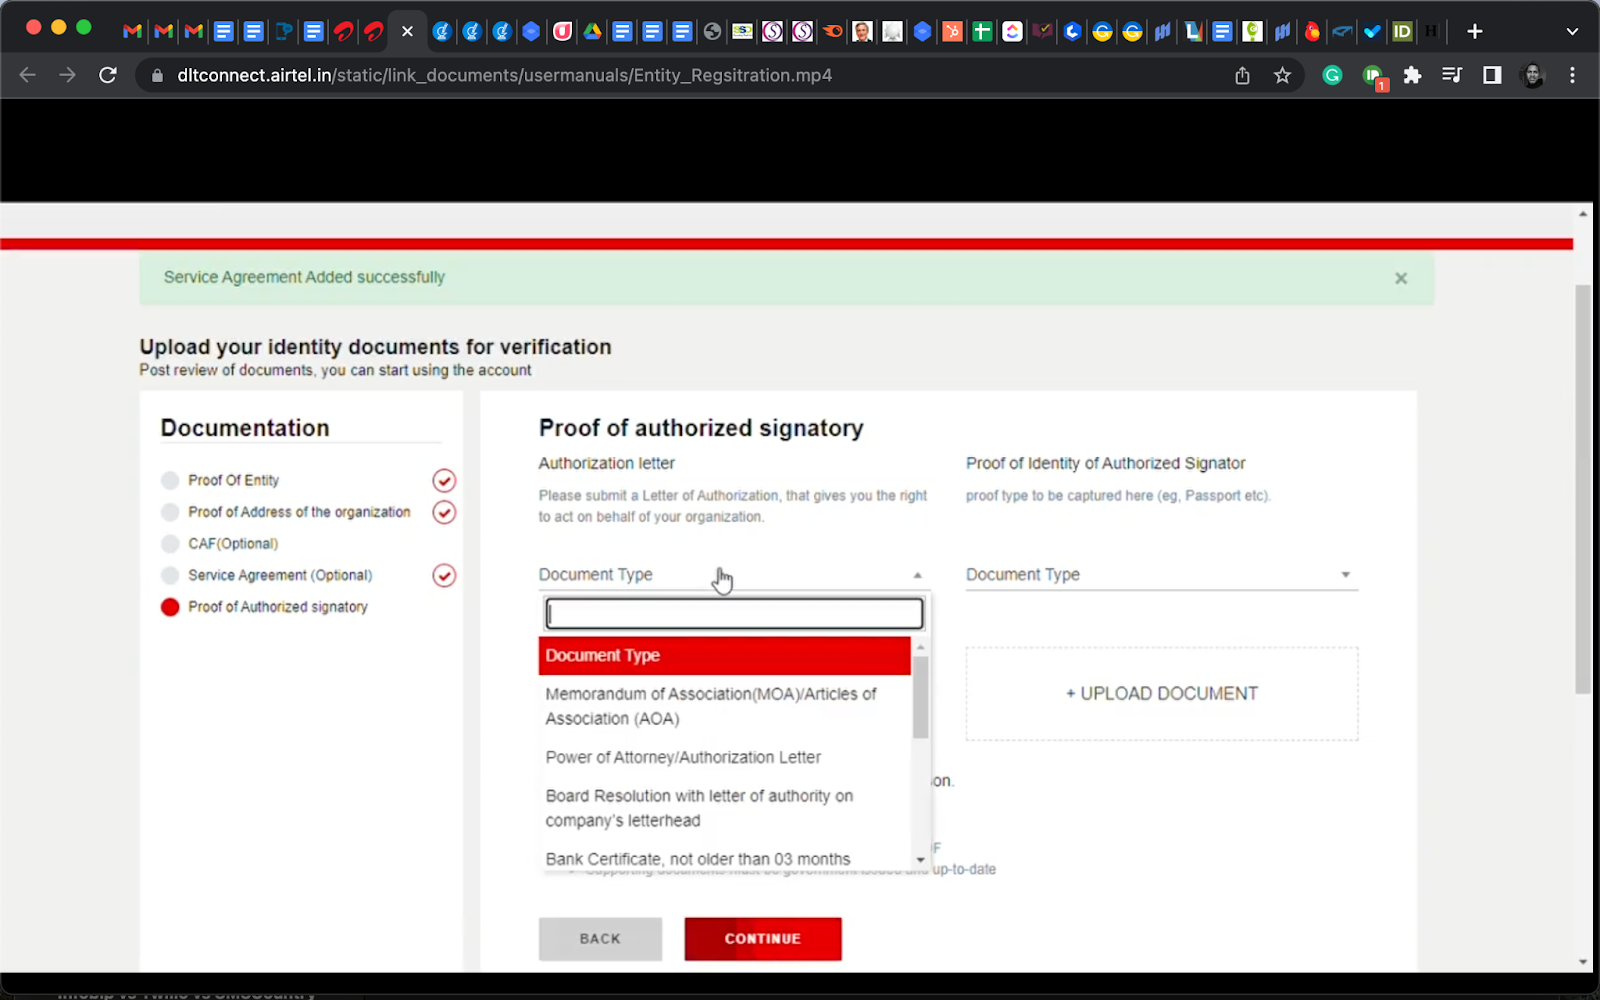
You have to fill each section with correct details before you proceed to the next one. Fill those sections marked as optional to increase your approval chances.
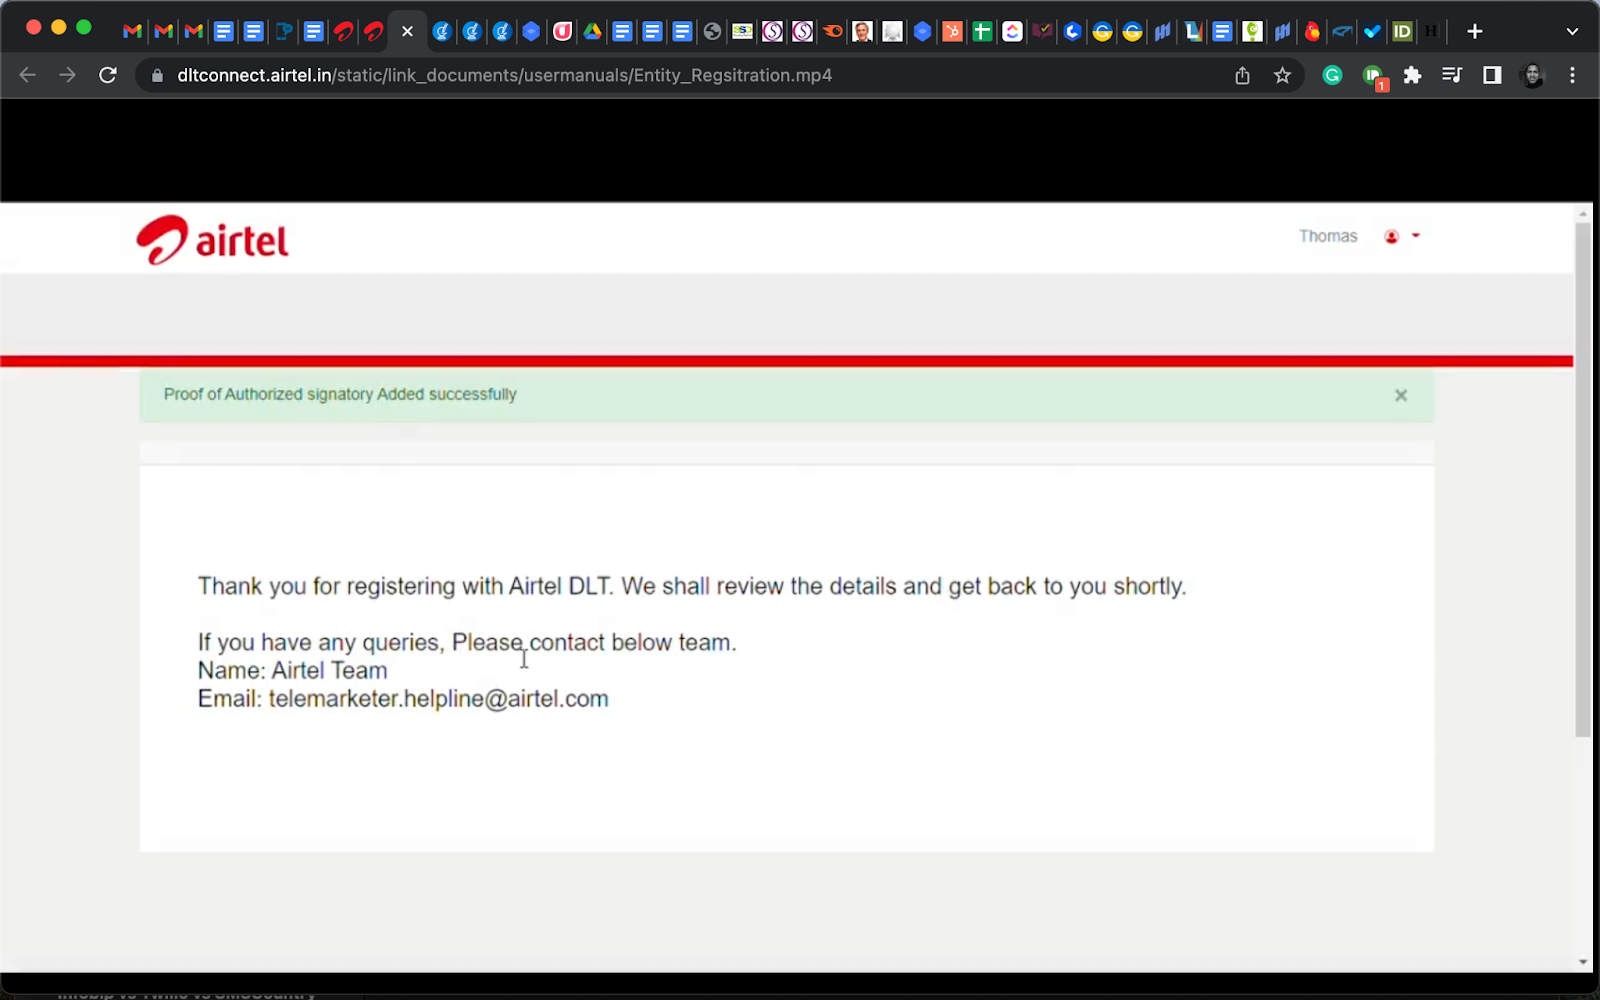
Once the Airtel DLT registrars have approved your request, you will receive an email notifying you of this. Congratulations on a successful DLT registration!
If you’re having any issues, contact our team or check out these guides:
- 4 expert tips for a fast and successful DLT registration process
- 5 reasons for DLT registration rejection and how to avoid them
But, you are not ready to start sending SMSes just yet. You have one more step to take, which is content template registration.
You have to register your SMS content template on the Airtel DLT portal. Let us show you how you can do that.
How do you register a template in Airtel?
Airtel content template registration means submitting your exact SMS wording, with variables marked, for approval within 24 hours. To register a content template as a principal entity, follow the steps below:
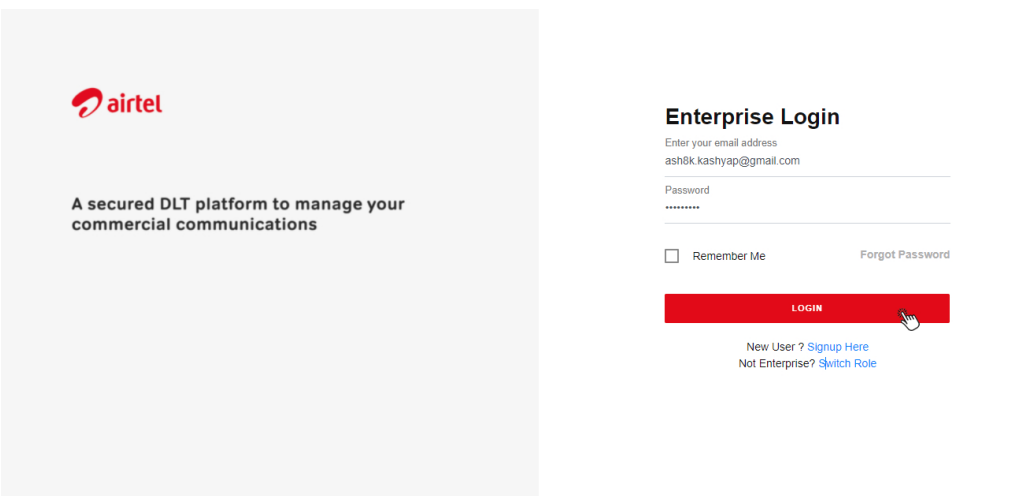
- Log in to your Airtel DLT dashboard with your login details (input the OTP)
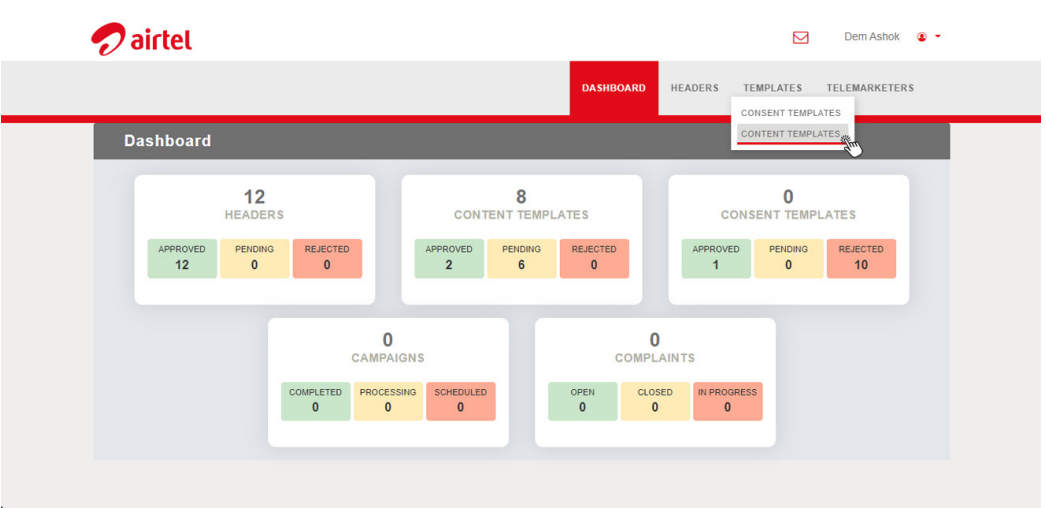
- At the top, select “Templates” and click on “Content templates”.
- Click on “+ADD” and a new page will load.
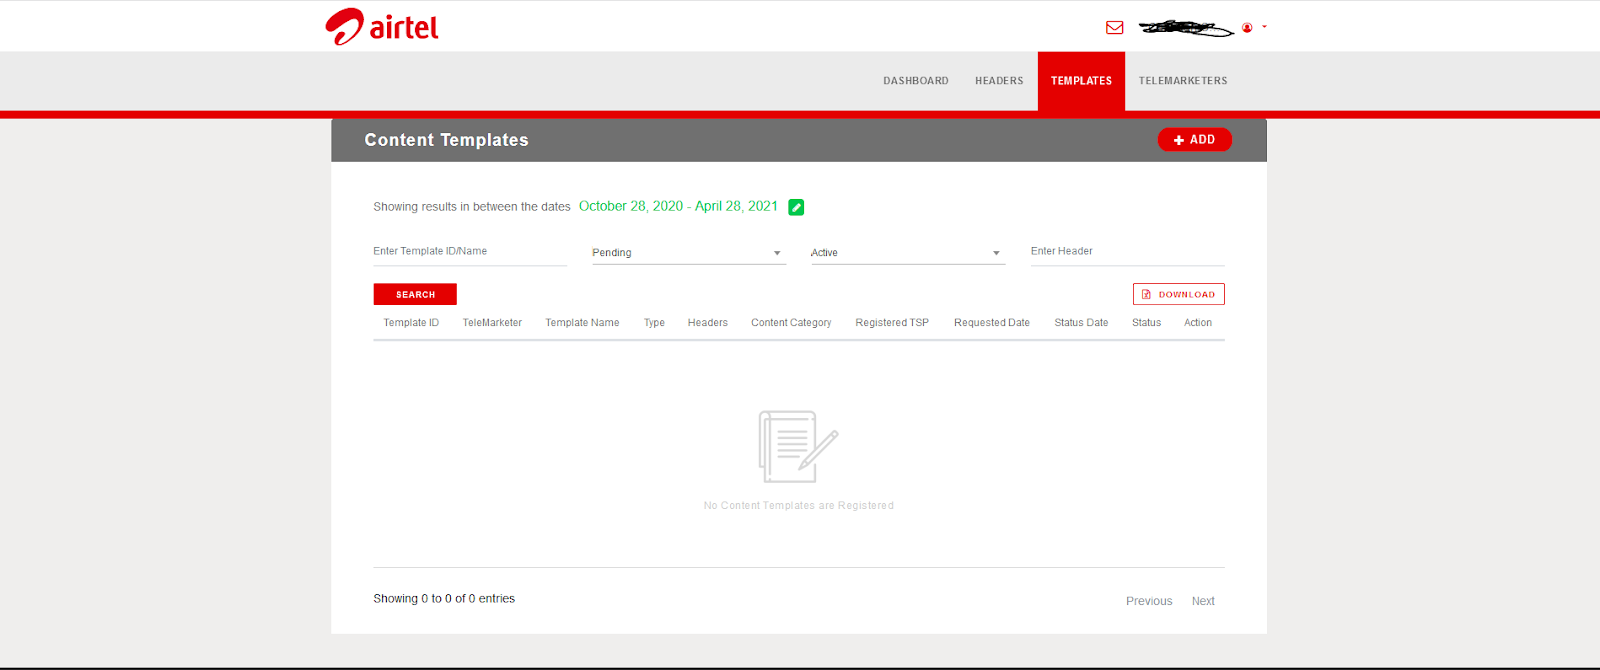
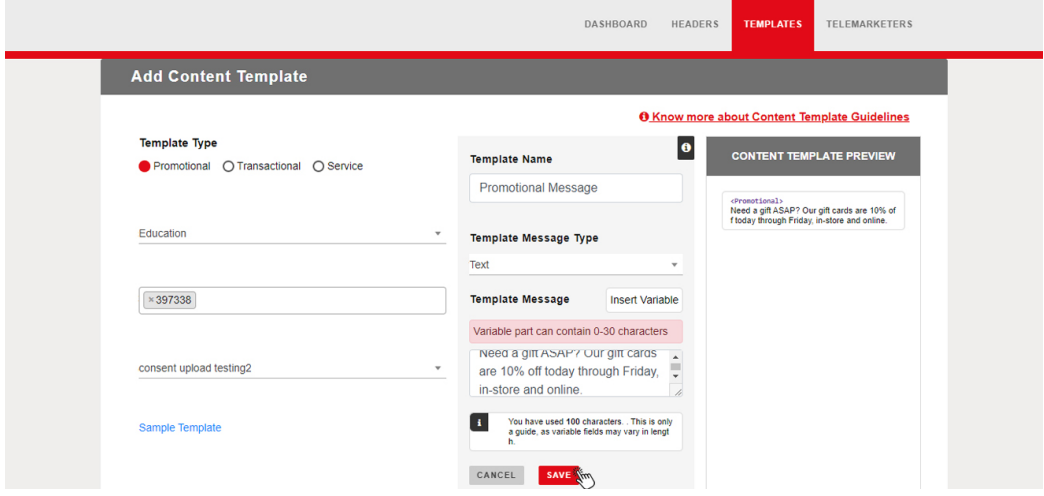
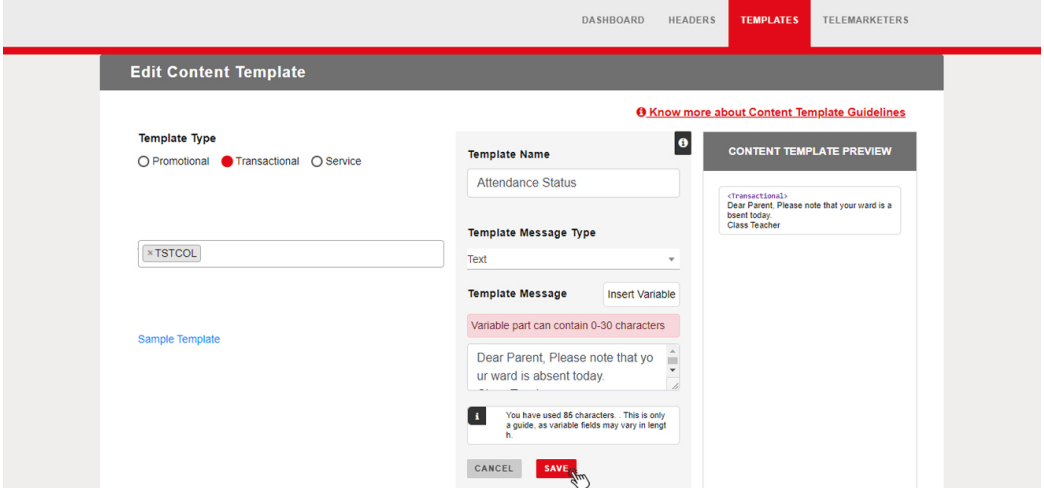
- Select one of the options under “Template Type” – promotional, transactional, or service.
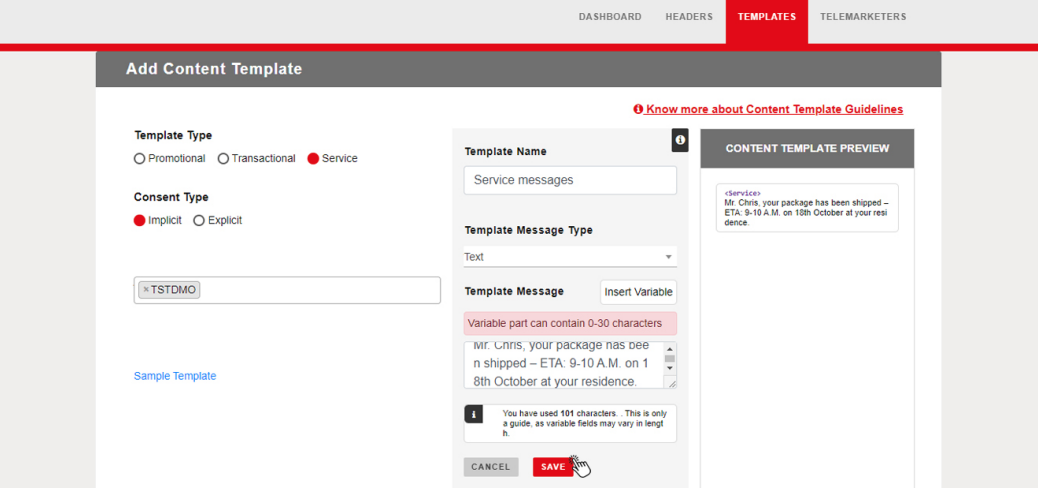
If you select “Service”, you’ll need to select a consent type – implicit or explicit. “Implicit” for messages that are part of business activities and “explicit” for informal messages such as birthday and holiday wishes.
- Next, search for the header that this message template should appear under and select it.
- Type in your template name.
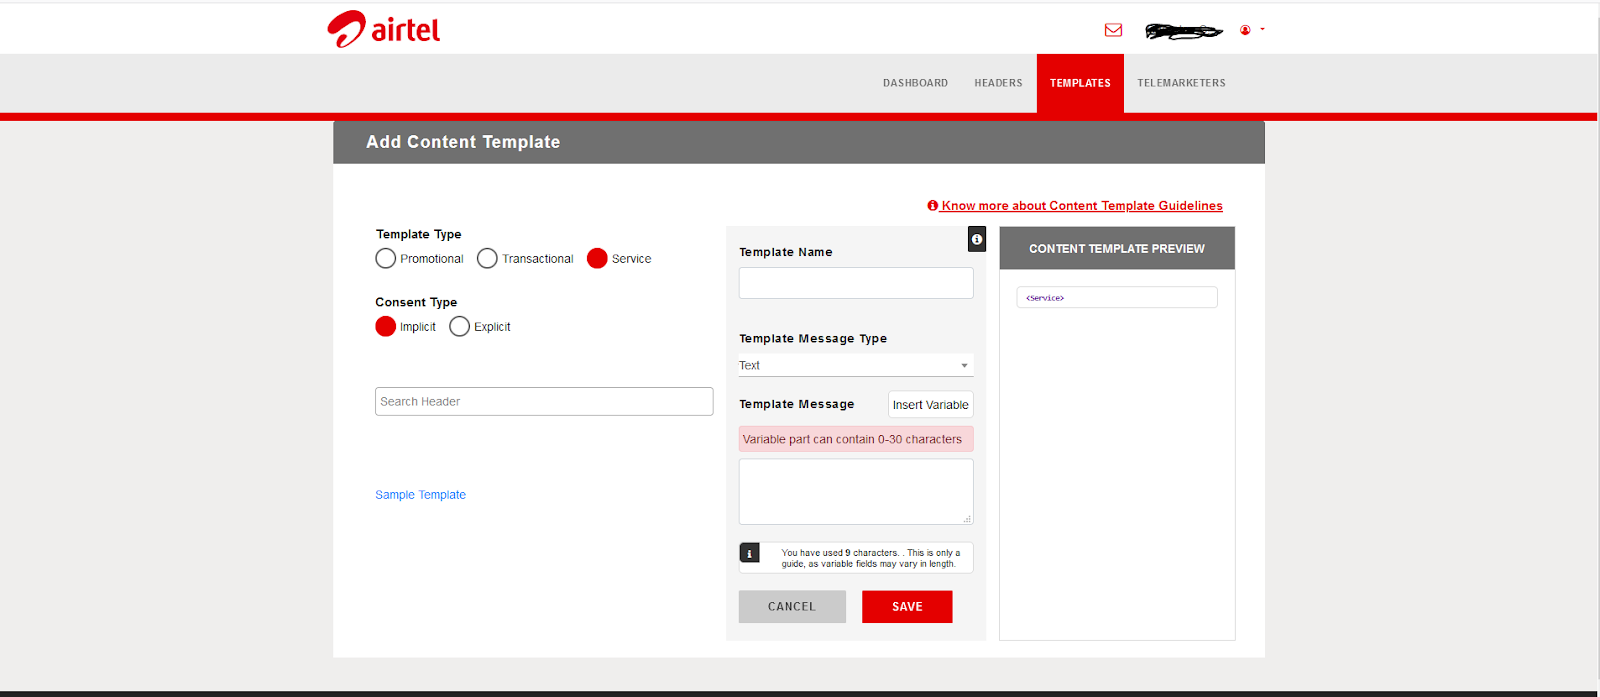
- Click on “Template Message Type” and select “Text” from the dropdown menu.
- In the box under “Template Message”, input a sample of the message that you will plan to send to your customers (type or paste it).
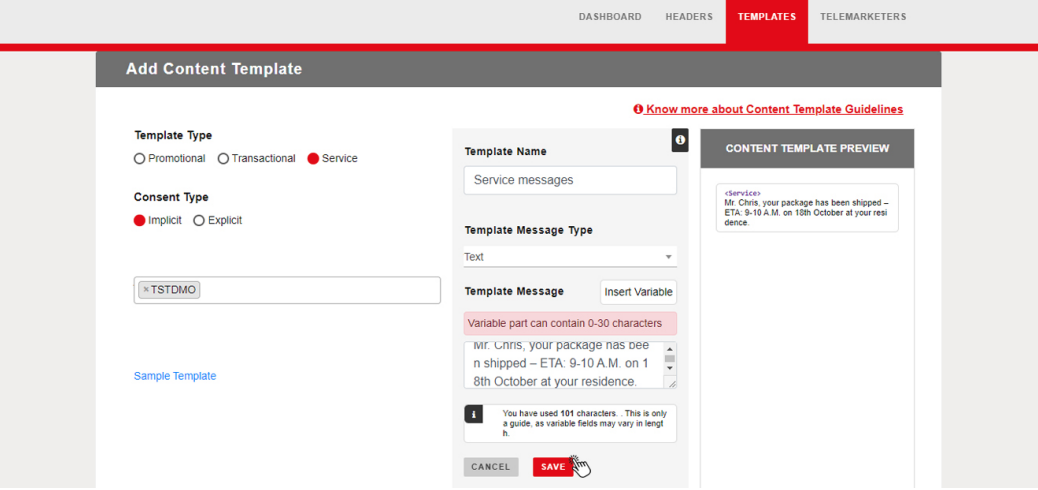
- Next, signify variables such as name and date that change for each customer. Click on their placeholders, then click on “Insert Variable”.
- Click “save” and confirm to submit it for approval. You can create more than one.
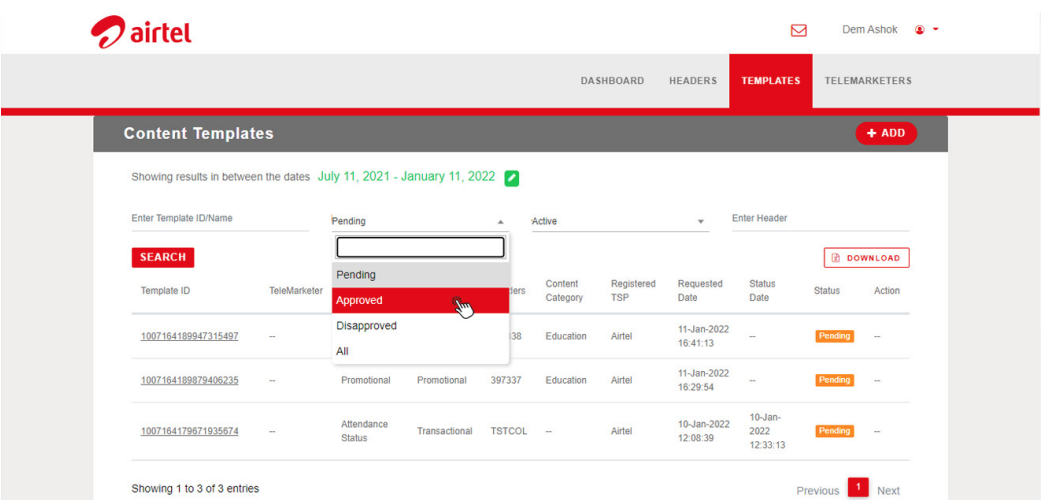
- The approval process can take up to 24 hours. After that, you will see their status change from “pending” to “approved”.
If you have gotten to this point then kudos to you, now you can go ahead and start sending out SMSes.
Having issues with your DLT entity or template registration? Contact our team or check out these guides:
- 4 top reasons your DLT template registration will be rejected
- 5 expert tips for successful DLT template registration
Still having Airtel DLT registration issues?
Most Airtel DLT rejections happen due to mismatched PAN details or unsigned authorisation letters – see our rejection-reasons guide to fix yours. Email info@smscountry.com and our team will help you get approved.
Frequently Asked Questions?
Approval typically takes up to 24–48 hours after document submission.
Yes, entity registration on the Airtel DLT portal has no charge.
Yes, all DLT platforms are interlinked, so registering on one is enough.
Most rejections are due to mismatched PAN details, unclear document scans, or a missing signed authorisation letter.

